Using CouchApp
CouchAppを使う
Installing CouchApp via easy_install should, as they say, be easy. Assuming all goes according to plan, it takes care of any dependencies and puts the couchapp utility into your system’s PATH so you can immediately begin by running the help command:
CouchAppをEasy_installを介してインストールすることはとても簡単です。インストール時にPATHを通してあるため、コマンドを打てばすぐに使い始めることができます。ヘルプを表示させるには以下のように実行します。
couchapp --help
We’ll be using the clone and push commands. clone pulls an application from a running instance in the cloud, saving it as a directory structure on your filesystem. push deploys a standalone CouchDB application from your filesystem to any CouchDB over which you have administrative control.
cloneとpushについて説明しましょう。cloneはCouchDBからアプリケーションを取得し、ローカルのファイルシステム上にあるディレクトリ構造で格納します。pushはCouchDBへアプリケーションを登録するときに使います。実行時にはCouchDBの管理者権限が必要になります。
Download the Sofa Source Code
Sofaのソースコードをダウンロードする
There are three ways to get the Sofa source code. They are all equally valid; it’s just a matter of personal preference and how you plan to use the code once you have it. The easiest way is to use CouchApp to clone it from a running instance. If you didn’t install CouchApp in the previous section, you can read the source code (but not install and run it) by downloading and extracting the ZIP or TAR file. If you are interested in hacking on Sofa and would like to join the development community, the best way to get the source code is from the official Git repository. We’ll cover these three methods in turn. First, enjoy Figure 1, “A happy bird to ease any install-induced frustration”.
Sofaのソースコードを取得する方法は三つあります。都合のよい方法で取得するのがよいでしょう。最も簡単なのはSofaが稼動しているCouchDB からCouchAppのcloneコマンドで取得する方法です。CouchAppをインストールしていない場合はzipまたはtar形式のファイルをダウンロードして解凍すればソースコードを読むことができます。Sofa自体をハックしたり、開発のコミュニティに参加したい場合はGitのリポジトリから取得するのが一番よいでしょう。この本の内容としては、どのやり方でも大丈夫です。
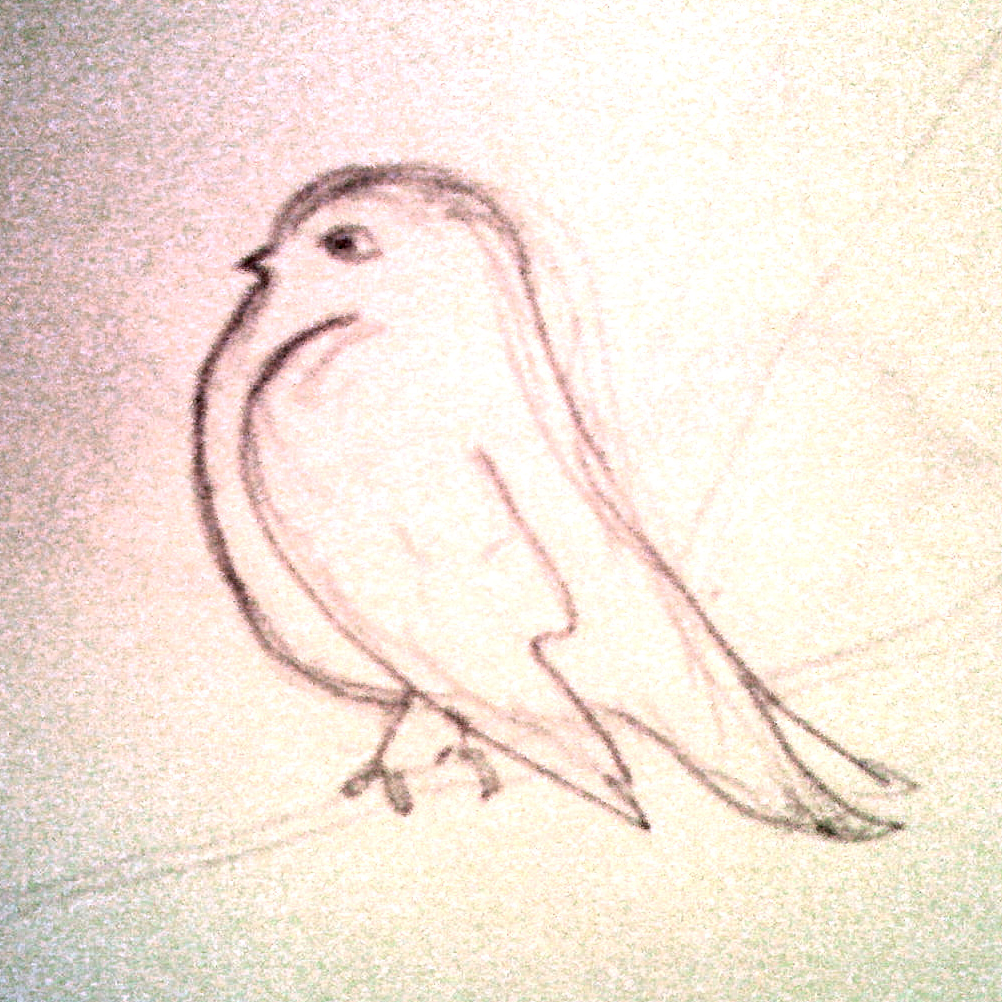
Figure 1. A happy bird to ease any install-induced frustration
Figure 1. インストールのフラストレーションから解放された幸運な小鳥
CouchApp Clone
CouchAppのクローンコマンドを実行する
One of the easiest ways to get the Sofa source code is by cloning directly from J. Chris’s blog using CouchApp’s clone command to download Sofa’s design document to a collection of files on your local hard drive. The clone command operates on a design document URL, which can be hosted in any CouchDB database accessible via HTTP. To clone Sofa from the version running on J. Chris’s blog, run the following command:
最も簡単な方法はChrisさんのblogサイトに対してcloneコマンドを実行してSofaのデザインドキュメントを直接入手することです。 cloneコマンドはデザインドキュメントのURLを指定して実行します。HTTP経由でアクセスが可能なCouchDBに対して実行することができます。ChrisさんのブログからSofaのアプリケーションをcloneするには、次のコマンドを実行してみましょう。
couchapp clone http://jchrisa.net/drl/_design/sofa
You should see this output:
次のような結果が表示されたでしょうか。
[INFO] Cloning sofa to ./sofa
Now that you’ve got Sofa on your local filesystem, you can skip to the section called “Deploying Sofa” to make a small local change and push it to your own CouchDB.
これでSofaがローカルのファイルシステム上に格納されたことになります。ローカルのCouchDB上で、Sofaを試してみたり、多少修正するぐらいであれば、以下の部分は読まなくても大丈夫です。
ZIP and TAR Files
Zip形式のファイルとTar形式のファイル
If you merely want to peruse the source code while reading along with this book, it is available as standard ZIP or TAR downloads. To get the ZIP version, access the following URL from your browser, which will redirect to the latest ZIP file of Sofa: http://github.com/couchapp/couchapp/zipball/master. If you prefer, a TAR file is available as well: http://github.com/couchapp/couchapp/tarball/master.
ソースコードをこの本に沿って読んでいきたいのであれば、zip形式またはtar形式のファイルをダウンロードするのがよいかもしれません。zip形式のファイルを取得するには `このURLへ The most up-to-date version of Sofa will always be available at its public code repository. If you are interested in staying up-to-date with development efforts and contributing patches back to the source, the best way to do it is via Git and GitHub.
最新バージョンのSofaは一般公開されている ソースコードのリポジトリから入手することができます。もし、開発やパッチの提供に興味があるなら、GitとGithubを利用するのがよいでしょう。
Git is a form of distributed version control that allows groups of developers to track and share changes to software. If you are familiar with Git, you’ll have no trouble using it to work on Sofa. If you’ve never used Git before, it has a bit of a learning curve, so depending on your tolerance for new software, you might want to save learning Git for another day—or you might want to dive in head first! For more information about Git and how to install it, see the official Git home page. For other hints and help using Git, see the GitHub guides.
Gitは分散バージョン管理ツールであり、開発者のグループがソフトウェアの変更を共有したり、追跡するのに役に立ちます。すでにGitに慣れている方にとってはSofaのコードを取り扱う点ことに何の問題もないでしょう。まだGitを使ったことがない方にとっては、少し敷居が高いかもしれません。Gitに関する詳しい情報やインストールの方法などは Gitの公式サイト を見てください。また、Githubにある ガイド も参考になると思います。 Sofaのソースコード(開発履歴を含む)をGitから取得するには以下のようにコマンドを実行します。
To get Sofa (including all development history) using Git, run the following command:
Now that you’ve got the source, let’s take a quick tour.
これでソースコードを取得できました。ソースコードの構成について、簡単に説明します。
Once you’ve succeeded with any of these methods, you’ll have a copy of Sofa on your local disk. The following text is generated by running the 以下のテキストデータはSofaのディレクトリ配下をtreeコマンドで表示させたものです。適宜、解説を入れていきます。
The source tree contains some files that aren’t necessary for the application—the ソースツリーには、実際のアプリケーションには必要のないファイルも含まれています。READMEやTHANKSといった類です。
The _attachmentsディレクトリはバイナリデータの添付ファイルとして Sofaのデザインドキュメントへ格納されます。CouchDBは添付ファイルをそのままの状態で管理してくれます(JSONラッパーを介さない形で)。そのため、JavaScript,CSS,HTMLファイルに対して直接ブラウザでアクセスすることができます。
Making your first edit to the Sofa source code will show you how easy it is to modify the application.
初めてSofaのソースコードを編集するなら、ここから始めるのがお勧めです。
The blog.json ファイルはSofaの設定を個別に変更するためのファイルです。最初はブログのタイトルのみが設定値として登録されています。早速、タイトルを変更してみてください。おそらく、"Daytime Running Lights"というタイトルをお好きな文字列に変更してみましょう。
You could add other blog configurations to this file—maybe things like how many posts to show per page and a URL for an About page for the author. Working changes like these into the application will be easy once you’ve walked through later chapters.
このファイルには他にも様々な設定を書いておくことができます。ひとつのページに対する投稿数を表示させるようにしたり、ブログの著者のプロフィールに関するURLを表示させるといったような設定です。この章を読み進めていけば、簡単にこうした設定変更ができるようになります。
We’ll see later that couchappのpushコマンドを実行すると、Sofaのトップページへのリンクが出力されます。この仕組みはシンプルなものです。couchappはdesign_doc.couchapp.index というJSONの項目を探し、見つかった場合はデザインドキュメントのURLをサイトのロケーションとして代入します。couchappのインデックスが特定できない場合は、attachmentにindex.htmlがあれば、そこをトップページとみなします。Sofaの場合は最近の投稿を一覧で表示するlist関数へのURLをトップページに指定しています。
The helpersディレクトリはひとつの例として選択しました。couchappはpushコマンドを実行すると複数のファイルやフォルダをデザインドキュメントとして登録します。上記の場合はmd5.jsというファイルがJSON形式にエンコードされ、design_document.helpers.md5属性として登録されます。
The listsディレクトリにはJavaScriptの関数を格納します。上記のファイル内にある関数はビューのデータをレンダリングしてSofaのHTMLとAtomフィードとして出力するためのものです。listsディレクトリ内に新しいファイルを配置して新しくlist関数を作ることもできます。list関数に関する詳細は"Viewing Lists of Blog Posts"の章で取り扱います。
The showsディレクトリにはブログの記事をHTML形式でレンダリングするための関数を登録しています。例ではブログの記事を読む場合と編集する場合とで二つの関数を登録しています。show関すについては次の章で詳しく取り扱います。
The templateディレクトリは先ほどのhelpersディレクトリに似ています。 lists,shows,viewsディレクトリとは違って、CouchDBのサーバー側では実行されないコードが格納されます。その代わり、 couchappのmacroを使うとlist関数やshow関数内にtemplateの内容を展開させることができます。pushコマンドを実行したタイミングで実行されます。templateディレクトリの名前は何でも結構です。デザインドキュメントを管理するための特別なディレクトリには直接含まれないためです。
This file corresponds to the JavaScript validation function used by Sofa to ensure that only the blog owner can create new posts, as well as to ensure that the comments are well formed. Sofa’s validation function is covered in detail in Chapter 12, Storing Documents.
このファイルにはバリデーション関数を書いておきます。Sofaではバリデーション関数を用いてブログのオーナーのみが記事を書くことができるといった制約を実装しています。Sofaのバリデーション関数については次の章でさらに詳しく取り扱います。
The vendorディレクトリではSofaが取り込んでいるプラグインのように使えるvendorパッケージのソースコードを格納しています。 Sofaの場合、vendorパッケージはcouchappのみです。couchappパッケージによってlist関数とshow関数などの効率のよい管理や、templateの展開する機能が提供されています。
During vendor内にある_attachments配下のファイルはデザインドキュメント内のattachmentsとして、pushコマンド実行時に格納されます。この場合はjquery.couchapp.jsというファイルがcalledcouchapp/jquery.couchapp.jsとして登録されます(これにより、複数のvendorパッケージが同じ添付ファイルを持っていたとしても競合することがありません)。
The viewsディレクトリではMap&Reduceによるviewの定義を管理しています。各viewはそれぞれひとつのディレクトリ単位で管理され、ディレクトリの中にmap関数とreduce関数のファイルを配置するようにします。
The source code is safely on your hard drive, and you’ve even been able to make minor edits to the blog.json ファイルに任意の変更を加えたら、ローカルのCouchDBへデプロイしてみましょう。pushコマンドはとてもシンプルで、簡単に動作しますが、 CouchDBの管理者権限が必要になります。この章が終わるころにはSofaをコピーしたものをローカルの環境で動かせるようになるでしょう。
Any time you make edits to the on-disk version of Sofa and want to see them in your browser, run the following command:
ローカルのソースコードを編集して、ブラウザで変更内容を確認したくなったら次のようにコマンドを打ってみましょう。
This deploys the Sofa source code into CouchDB. You should see output like this:
これでCouchDBへSofaのソースコードがデプロイされたことになります。次のようなメッセージが出力されているでしょうか。
If you get an error, make sure your target CouchDB instance is running by making a simple HTTP request to it:
エラーが出た場合は、pushコマンドの対象になっているCouchDBのインスタンスがHTTPリクエストに応答するか以下のように確認してみましょう。
The response should look like:
以下のように返ってくれば、デプロイの対象にしているインスタンスには問題ありません。
If CouchDB is not running yet, go back to Chapter 3, Getting Started and follow the “Hello World” instructions there.
CouchDBがまだ稼動していなかったら、Getting Startedの章に戻って導入方法を確認してみてください。
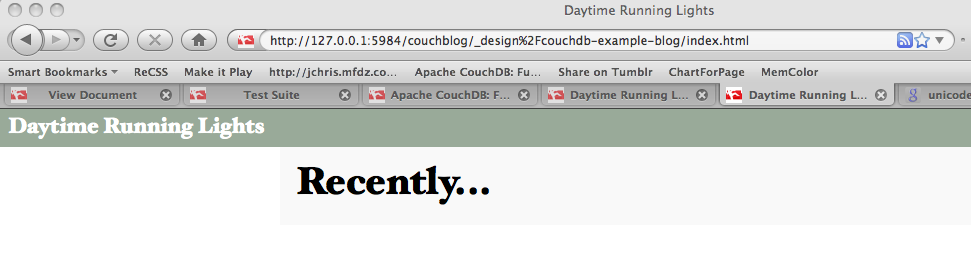
If CouchDB was running, then pushコマンドを実行したときに、 アプリケーションのURL が出力されたはずです。ブラウザでアクセスすると、以下のような画面が出力されると思います。
Figure 2. Empty index page
Figure 2. まだ記事がないトップページ
We’re not done yet—there are a couple of steps remaining before you’ve got a fully functional Sofa instance.
Sofaを使いこなせるようになるまで、あともう少しです。
Sofa is a single-user application. You, the author, are the administrator and the only one who can add and edit posts. To make sure no one else goes in and messes with your writing, you must create an administrator account in CouchDB. This is a straightforward task. Find your Sofaはユーザー1人向けのアプリケーションです。ブログの著者としてのユーザーのみが記事を投稿し、編集することができます。他の誰かによる改ざんなどを防ぐために、CouchDB内で管理者アカウントを用意しておく必要があります。local.iniファイルを探し、テキストエディタで開いてみてください(/usr/local/etc/couchdb/local.ini がデフォルトの場所になります)。[admins]セクションの脇にあるコメント記号を外してください。その後、[admins]セクションの配下にユーザー名とパスワードを記述します。
Now that you’ve edited your local.iniの変更を適用するためにはCouchDBを再起動する必要があります。再起動の方法はいくつかります。コンソールから CouchDBを起動している場合は、Ctrl + Cを押して一旦停止した後に、再度CouchDBを起動します。先ほどのlocal.iniファイルではパスワードを平文で管理しているのでしょうか。心配はいりません。CouchDBが変更後のlocal.iniファイルを読み込んだ時点で、パスワードは以下のようにハッシュ値に変換されるようになっています。
If you don’t like your passwords lying around in plain-text files, don’t worry. When CouchDB starts up and reads this file, it takes your password and changes it to a secure hash, like this:
CouchDB will now ask you for your credentials when you try to create databases or change documents—exactly the things you want to keep to yourself.
これで、データベースを作成したり、ドキュメントを変更しようとすると認証が要求されるようになります。
Now that we’ve set up admin credentials, we’ll need to supply them on the command line when running 管理者権限を設定した後のpushコマンドは以下のように実行します。
Make sure to replace jchrisという名前とパスワードは各自変更してご利用ください。おそらく、パーミッションエラーになるでしょう。これまでの設定がうまくいけば、ブログアプリケーションを利用する準備が全て整ったことになります。
At this point, we are technically ready to move on, but you’ll be much happier if you make use of the あとは、.couchapprcの使い方を覚えればさらに快適に開発ができるようになります。次の節で紹介します。
If you don’t want to have to put the full URL (potentially including authentication parameters) of your database onto the command line each time you push, you can use the pushコマンドを実行する度に、URLを全て記入するのが煩わしい(特に認証機能を有効にしてから)と思っている方は.couchapprcファイルに設定を書き込んでおくとよいでしょう。このファイルはpushコマンドの対象になりません。そのため、認証情報等を書いておいても問題ありません。.couchapprcは各アプリケーションのディレクトリ内に存在しています。sofaなら、/path/to/the/directory/of/sofa/.couchapprc といった具合です。ドットで始まるファイルは隠しファイルの扱いになり、通常は表示されません。隠しファイルも表示する設定にすれば確認することができます。たとえば、-aオプションを追加してlsコマンドを実行してみます。
The With this file set up, you can push your CouchApp with the command 準備ができたら、pushコマンドを実行しましょう。何も指定しない場合は"default"に書いてあるデータベースに対してpushコマンドを実行します。CouchAppは複数の開発環境を容易に切り替えることができます。開発用のデータベースにアプリケーションをpushする場合は couchapp push dev と実行します。経験上、.couchapprcを使って設定を保存しておくことをお勧めします。パスワードを毎回、画面に表示させなくてもよくなります。
Join the Sofa Development Community on GitHub
GithubでSofaの開発コミュニティに参加する
git clone git://github.com/jchris/sofa.git
The Sofa Source Tree
Sofaのソースコードツリー
tree command on the Sofa directory to reveal the full set of files it contains. Sections of the text are annotated to make it clear how various files and directories correspond to the Sofa design document.
sofa/
|-- README.md
|-- THANKS.txt
README and THANKS files are among those.
|-- _attachments
|   |-- LICENSE.txt
|   |-- account.html
|   |-- blog.js
|   |-- jquery.scrollTo.js
|   |-- md5.js
|   |-- screen.css
|   |-- showdown-licenese.txt
|   |-- showdown.js
|   |-- tests.js
|   `-- textile.js
_attachments directory contains files that are saved to the Sofa design document as binary attachments. CouchDB serves attachments directly (instead of including them in a JSON wrapper), so this is where we store JavaScript, CSS, and HTML files that the browser will access directly.
|-- blog.json
blog.json file contains JSON used to configure individual installations of Sofa. Currently, it sets one value, the title of the blog. You should open this file now and personalize the title field—you probably don’t want to name your blog “Daytime Running Lights,” so now’s your chance to come up with something more fun!
|-- couchapp.json
couchapp outputs a link to Sofa’s home page when couchapp push is run. The way this works is pretty simple: CouchApp looks for a JSON field on the design document at the address design_doc.couchapp.index. If it finds it, it appends the value to the location of the design document itself to build the URL. If there is no CouchApp index specified, but the design document has an attachment called index.html, then it is considered the index page. In Sofa’s case, we use the index value to point to a list of the most recent posts.
|-- helpers
|   `-- md5.js
helpers directory here is just an arbitrary choice—CouchApp will push any files and folders to the design document. In this case, the source code to md5.js is JSON-encoded and stored on the design_document.helpers.md5 element.
|-- lists
|   `-- index.js
lists directory contains a JavaScript function that will be executed by CouchDB to render view rows as Sofa’s HTML and Atom indexes. You could add new list functions by creating new files within this directory. Lists are covered in depth in Chapter 14, Viewing Lists of Blog Posts.
|-- shows
|   |-- edit.js
|   `-- post.js
shows directory holds the functions CouchDB uses to generate HTML views of blog posts. There are two views: one for reading posts and the other for editing. We’ll look at these functions in the next few chapters.
|-- templates
|   |-- edit.html
|   |-- index
|   |   |-- head.html
|   |   |-- row.html
|   |   `-- tail.html
|   `-- post.html
templates directory is like the helpers directory and unlike the lists, shows, or views directories in that the code stored is not directly executed on CouchDB’s server side. Instead, the templates are included into the body of the list and show functions using macros run by CouchApp when pushing code to the server. These CouchApp macros are covered in Chapter 12, Storing Documents. The key point is that the templates name could be anything. It is not a special member of the design document; just a convenient place to store and edit our template files.
|-- validate_doc_update.js
|-- vendor
|   `-- couchapp
|       |-- README.md
|       |-- _attachments
|       |   `-- jquery.couchapp.js
|       |-- couchapp.js
|       |-- date.js
|       |-- path.js
|       `-- template.js
vendor directory holds code that is managed independently of the Sofa application itself. In Sofa’s case, the only vendor package used is couchapp, which contains JavaScript code that knows how to do things like link between list and show URLs and render templates.
couchapp push, files within a vendor/**/_attachments/* path are pushed as design document attachments. In this case, jquery.couchapp.js will be pushed to an attachment called couchapp/jquery.couchapp.js (so that multiple vendor packages can have the same attachment names without worry of collisions).
`-- views
    |-- comments
    |   |-- map.js
    |   `-- reduce.js
    |-- recent-posts
    |   `-- map.js
    `-- tags
        |-- map.js
        `-- reduce.js
views directory holds MapReduce view definitions, with each view represented as a directory, holding files corresponding to map and reduce functions.
Deploying Sofa
Sofaをデプロイする
blog.json file. Now it’s time to deploy the blog to a local CouchDB. The push command is simple and should work the first time, but two other steps are involved in setting up an admin account on your CouchDB and for your CouchApp deployments. By the end of this chapter you’ll have your own running copy of Sofa.
Pushing Sofa to Your CouchDB
SofaをCouchDBへpushする
couchapp push . sofa
[INFO] Pushing CouchApp in /Users/jchris/sofa to design doc:
http://127.0.0.1:5984/sofa/_design/sofa
[INFO] Visit your CouchApp here:
http://127.0.0.1:5984/sofa/_design/sofa/_list/index/recent-posts?descending=
true&limit=5
curl http://127.0.0.1:5984
{"couchdb":"Welcome","version":"0.10.1"}
Visit the Application
Webアプリケーションにアクセスしてみる
couchapp push should have directed you to visit the application’s index URL. Visiting the URL should show you something like Figure 2, “Empty index page”.
Set Up Your Admin Account
管理者権限を設定する
local.ini file and open it in your text editor. (By default, it’s stored at /usr/local/etc/couchdb/local.ini.) If you haven’t already, uncomment the [admins] section at the end of the file. Next, add a line right below the [admins] section with your preferred username and password:
[admins]
jchris = secretpass
local.ini configuration file, you need to restart CouchDB for changes to take effect. Depending on how you started CouchDB, there are different methods of restarting it. If you started in a console, then hitting Ctrl-C and rerunning the same command you used to start it is the simplest way.
[admins]
jchris = -hashed-207b1b4f8434dc604206c2c0c2aa3aae61568d6c,96406178007181395cb72cb4e8f2e66e
Deploying to a Secure CouchDB
セキュアなCouchDBへデプロイする
couchapp push. Let’s try it:
couchapp push . http://jchris:secretpass@localhost:5984/sofa
jchris and secretpass with your actual values or you will get a “permission denied” error. If all works according to plan, everything will be set up in CouchDB and you should be able to start using your blog.
.couchapprc file as documented in the next section.
Configuring CouchApp with .couchapprc
.couchapprcでCouchAppの設定を管理する
.couchapprc file to store deployment settings. The contents of this file are not pushed along with the rest of the app, so it can be a safe place to keep credentials for uploading your app to secure servers.
.couchapprc file lives in the source directory of your application, so you should look to see if it is at /path/to/the/directory/of/sofa/.couchapprc (or create it there if it is missing). Dot files (files with names that start with a period) are left out of most directory listings. Use whatever tricks your OS has to “show hidden files.” The simplest one in a standard command shell is to list the directory using ls -a, which will show all hidden files as well as normal files.
    {
      "env": {
        "default": {
          "db": "http://jchris:secretpass@localhost:5984/sofa"
        },
        "staging": {
          "db": "http://jchris:secretpass@jchrisa.net:5984/sofa-staging"
        },
        "drl": {
          "db": "http://jchris:secretpass@jchrisa.net/drl"
        }
      }
    }
couchapp push, which will push the application to the “default” database. CouchApp also supports alternate environments. To push your application to a development database, you could use couchapp push dev. In our experience, taking the time to set up a good .couchapprc is always worth it. Another benefit is that it keeps your passwords off the screen when you are working.