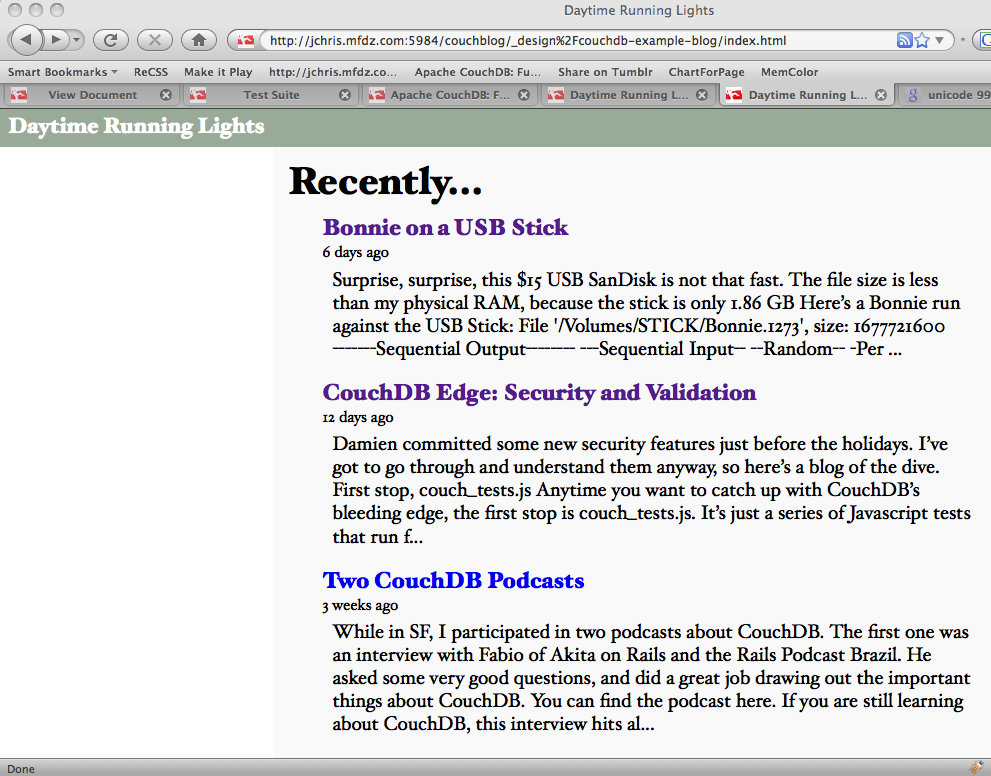
Figure 1. The rendered index page
The last few chapters dealt with getting data into and out of CouchDB. You learned how to model your data into documents and retrieve it via the HTTP API. In this chapter, we’ll look at the views used to power Sofa’s index page, and the list function that renders those views as HTML or XML, depending on the client’s request.
残りはCouchDBのデータ入出力についてです。データをどのようにドキュメントとして設計するか、HTTPによるAPIを介してどのようにドキュメントを操作するかをこれまで学習してきました。この章では、viewを取り扱います。クライアントの要求に応じてHTMLやXML形式にドキュメントをレンダリングしてくれるlist関数が主なテーマになります。
Now that we’ve successfully created a blog post and rendered it as HTML, we’ll be building the front page where visitors will land when they’ve found your blog. This page will have a list of the 10 most recent blog posts, with titles and short summaries. The first step is to write the MapReduce query that constructs the index used by CouchDB at query time to find blog posts based on when they were written.
これまでの解説で、記事を書いてブログに投稿し、HTMLとして表示できるようになりました。あとは閲覧者向けのフロントページを作成すればいいことになります。フロントページには直近の投稿をタイトルと概要のみリスト形式で表示させるようにします。まずはCouchDBに対するmap&reduceの問い合わせを書くところから始めましょう。
In Chapter 6, Finding Your Data with Views, we noted that reduce isn’t needed for many common queries. For the index page, we’re only interested in an ordering of the posts by date, so we don’t need to use a reduce function, as the map function alone is enough to order the posts by date.
viewによるデータ検索の章で、reduce関数は必須ではない点を説明しました。今回も日付順に投稿を表示できればそれでよいため、reduce関数は必要ありません。map関数で十分です。
You’re now ready to write the map function that builds a list of all blog posts. The goals for this view are simple: sort all blog posts by date.
ブログ記事の一覧を用事するためのmap関数を書いていきましょう。このviewの目的は単純です。日付順に記事を並び替えればよいのです。
Here is the source code for the view function. I’ll call out the important bits as we encounter them.
以下はviewの関数を定義したコードです。単純ではありますが、とても重要な内容が含まれています。
function(doc) {
  if (doc.type == "post") {
The first thing we do is ensure that the document we’re dealing with is a post. We don’t want comments or anything other than blog posts getting on the front page. The expression doc.type == "post" evaluates to true for posts but no other kind of document. In Chapter 7, Validation Functions, we saw that the validation function gives us certain guarantees about posts, designed to make us comfortable about putting them on the front page of our blog.
最初はドキュメントが"投稿"であるかを確認します。ブログの記事ではないドキュメントにコメントを書くことなど、だれも望んではいないでしょう。doc.type == "post"でドキュメントの種類を判別しています。バリデーション機能の章で、バリデーション関数が投稿内容の検証に有効である点を説明しました。ドキュメントの種別といった処理自体をハンドリングするのに有用な部分ではなく、内容そのものへの検証はバリデーション関数を利用するとよいでしょう。
var summary = (doc.html.replace(/<(.|\n)*?>/g, '').substring(0,350) + '...');
This line shortens the blog post’s HTML (generated from Markdown before saving) and strips out most tags and images, at least well enough to keep them from showing up on the index page, for brevity.
この行は記事の要約として本来のHTML(Markdown記法で書いたものから生成されたもの)から文字列を抜き出しています。フロントページに記事の要約として表示させるときに使います。
The next section is the crux of the view. We’re emitting for each document a key (doc.created_at) and a value. The key is used for sorting, so that we can pull out all the posts in a particular date range efficiently.
次のところはviewにとってのポイントとなる部分です。それぞれのドキュメントから出力するキー(ここではdoc.created_at)とバリューを指定しています。キーはドキュメントを並び替えるのに使われます。これをうまく活用し、ブログの記事を投稿日付を基準に効率よく並び替えています。
    emit(doc.created_at, {
      html : doc.html,
      summary : summary,
      title : doc.title,
      author : doc.author
    });
The value we’ve emitted is a JavaScript object, which copies some fields from the document (but not all), and the summary string we’ve just generated. It’s preferable to avoid emitting entire documents. As a general rule, you want to keep your views as lean as possible. Only emit data you plan to use in your application. In this case we emit the summary (for the index page), the HTML (for the Atom feed), the blog post title, and its author.
出力する値はJavaScriptのオブジェクトであり、ドキュメントの項目から値をコピーしたものもあります。summaryの部分は先ほどの処理でドキュメントから抽出しました。ドキュメントの内容を全て出力することは控えたほうがよいでしょう。一般的にviewはある目的に特化した形で定義する傾向があります。そうすると、viewから出力したデータは特定のアプリケーションでのみ使用するようなります。ここではsummary(フロントページで使用する)やhtml(atomフィードとして使用する),titleやauthorといったようにドキュメントから抽出したデータのまとまりがそれに該当します。
  }
};
You should be able to follow the definition of the previous map function just fine by now. The emit() call creates an entry for each blog post document in our view’s result set. We’ll call the view recent-posts. Our design document looks like this now:
ここまで解説したviewをmap関数として定義します。emit関数が呼び出される度にブログ記事のドキュメントがview実行時の結果として返ってきます。例で扱っているviewは"recent-post"と名前を付けています。デザインドキュメントは以下のようになります。
{
  "_design/sofa",
  "views": {
    "recent-posts": {
      "map": "function(doc) { if (doc.type == "post") { ... code to emit posts ... }"
    }
  }
  "_attachments": {
    ...
  }
}
CouchApp manages aggregating the filesystem files into our JSON design document, so we can edit our view in a file called views/recent-posts/map.js. Once the map function is stored on the design document, our view is ready to be queried for the latest 10 posts. Again, this looks very similar to displaying a single post. The only real difference now is that we get back an array of JSON objects instead of just a single JSON object.
CouchAppは複数のファイルをとりまとめ、JSON形式で書かれたデザインドキュメントに変換してくれます。map関数であれば、views/recent-posts/map.jsというファイルにコードを書いておきます。
The GET request to the URI is:
URLにGETリクエストを発行します。
/blog/_design/sofa/_view/recent-posts
A view defined in the document /database/_design/designdocname in the views field ends up being callable under /database/_design/designdocname/_view/viewname.
viewは/database/_design/designdocnameの中に定義されています。使用するときは/database/_design/designdocname/_view/viewnameのように指定します。
You can pass in HTTP query arguments to customize your view query. In this case, we pass in:
viewを使って問い合わせをするときに、いくつか引数を指定することができます。たとえば、以下のような引数です。
descending: true, limit: 5
This gets the latest post first and only the first five posts in all.
投稿を最新順に5件表示させる場合はこのようにパラメータを指定します。
The actual view request URL is:
viewを実行するときの具体的なURLは以下のようになります。
/blog/_design/sofa/_view/recent-posts?descending=true&limit=5
The _list function was covered in detail in Chapter 5, Design Documents. In our example application, we’ll use a JavaScript list function to render a view of recent blog posts as both XML and HTML formats. CouchDB’s JavaScript view server also ships with the ability to respond appropriately to HTTP content negotiation and Accept headers.
_list APIについてはデザインドキュメントの章で詳しく解説しています。サンプルアプリケーションでは、ブログとしてのドキュメントをXMLとHTMLの両方にレンダリングするためにlist関数を使用しています。CouchDBが用いているサーバーサイドのJavaScriptによるviewはHTTPのコンテントネゴシエーションやヘッダ処理にも的確に対応してくれます。
The essence of the _list API is a function that is fed one row at a time and sends the response back one chunk at a time.
_list APIの特徴はデータを1行ごとに処理し、処理結果をその都度返すようになっているところです。
Let’s take a look at Sofa’s list function. This is a rather long listing, and it introduces a few new concepts, so we’ll take it slow and be sure to cover everything of interest.
Sofaのlist関数を見てみましょう。コードが少し長めで、いくつか新しい内容が含まれているため、ゆっくりと解説していこうと思います。
function(head, req) {
  // !json templates.index
  // !json blog
  // !code vendor/couchapp/path.js
  // !code vendor/couchapp/date.js
  // !code vendor/couchapp/template.js
  // !code lib/atom.js
The top of the function declares the arguments head and req. Our function does not use head, just req, which contains information about the request such as the headers sent by the client and a representation of the query string as sent by the client. The first lines of the function are CouchApp macros that pull in code and data from elsewhere in the design document. As we’ve described in more detail in Chapter 11, Managing Design Documents, these macros allow us to work with short, readable functions that pull in library code from elsewhere in the design document. Our list function uses the CouchApp JavaScript helpers for generating URLs (path.js), for working with date objects (date.js), and the template function we’re using to render HTML.
関数のはじめにはheadとreqという引数が定義されています。今回はheadは使用せず、reqのみを使用しています。reqにはクライアント側から送信されたクエリーの文字列やヘッダ情報が格納されています。最初の行はCouchAppのマクロです。マクロを使うことで、デザインドキュメントの中に含まれている別出しのコードとデータを展開することができます。マクロについての詳細はデザインドキュメントの章で取り扱っています。マクロを使うと、ライブラリとしてまとめてあるコードを読み込むことで実装しようとしているコードを短くすると共に可読性を向上させることができます。ここではCouchAppのJavaScriptヘルパー関数を読み込んでいます。urlを生成する関数(path.js)や、日付処理をするためのオブジェクト(date.js)、HTMLにレンダリングするためのテンプレート関数などです。
  var indexPath = listPath('index','recent-posts',{descending:true, limit:5});
  var feedPath = listPath('index','recent-posts',{descending:true, limit:5, format:"atom"});
The next two lines of the function generate URLs used to link to the index page itself, as well as the XML Atom feed version of it. The listPath function is defined in path.js—the upshot is that it knows how to link to lists generated by the same design document it is run from.
次の2行はトップページへのリンクに使うURLを生成するための関数です。XML Atomフィードによるパターンも入っています。listPath関数はpath.js内で定義されており、デザインドキュメントで生成されたlistへのリンクを作成してくれます。
The next section of the function is responsible for rendering the HTML output of the blog. Refer to Chapter 8, Show Functions for details about the API we use here. In short, clients can describe the format(s) they prefer in the HTTP Accept header, or in a format query parameter. On the server, we declare which formats we provide, as well as assign each format a priority. In cases where the client accepts multiple formats, the first declared format is returned. It is not uncommon for browsers to accept a wide range of formats, so take care to put HTML at the top of the list, or else you can end up with browsers receiving alternate formats when they expect HTML.
その次の部分はHTMLにレンダリングするための記述です。詳しい解説はShow関数の章を見てください。クライアント側でHTTP Acceptヘッダや問い合わせのパラメーターに従って、任意の書式でドキュメントを扱うことができる一方で、サーバー側でもどの書式でドキュメントを提供するのか決めることができます。クライアント側で複数の書式を受け入れることができる場合は最初に定義した書式が採用されます。書式は様々な種類のブラウザーで共有して使うことになります。HTMLを出力する場合は注意が必要です。各ブラウザーごとに違った解釈をされる場合があります。
provides("html", function() {
The provides function takes two arguments: the name of the format (which is keyed to a list of default MIME types) and a function to execute when rendering that format. Note that when using provides, all send and getRow calls must happen within the render function. Now let’s look at how the HTML is actually generated.
provides関数には、書式の名前(デフォルトのmime-typesから選択したもの)とレンダリングするときに実行する関数といった二つの引数を設定します。provides関数を使うときは、send関数とgetRow関数はレンダリングしている関数のなかでのみ使用できます。今度はHTMLがどのように出力されるのか見ていきましょう。
    send(template(templates.index.head, {
      title : blog.title,
      feedPath : feedPath,
      newPostPath : showPath("edit"),
      index : indexPath,
      assets : assetPath()
    }));
The first thing we see is a template being run with an object that contains the blog title and a few relative URLs. The template function used by Sofa is fairly simple; it just replaces some parts of the template string with passed in values. In this case, the template string is stored in the variable templates.index.head, which was imported using a CouchApp macro at the top of the function. The second argument to the template function are the values that will be inserted into the template; in this case, title, feedPath, newPostPath, index, and assets. We’ll look at the template itself later in this chapter. For now, it’s sufficient to know that the template stored in templates.index.head renders the topmost portion of the HTML page, which does not change regardless of the contents of our recent posts view.
send関数の最初の引数にはテンプレートを指定します。ブログのタイトルや関連するURLなどを表示させるときの体裁や文書構造が含まれます。Sofaでのtemplate関数の使い方はとてもシンプルです。テンプレート内にある特定の文字列を後から置き換えているだけです。この場合は、テンプレートとなる文字列はtemplates.index.headという変数に格納されています。この変数はCouchAppのマクロとしてコードの冒頭で展開しているものです。二番目の引数はテンプレートへ挿入するための値を指定します。この例では、title, feedPath, newPostPath, index, and assets を指定しています。HTMLとして出力すべき大半の内容はテンプレートとしてtemplates.index.headの中にあります。テンプレートに書かれてある内容は最近の投稿内容に依存しない作りになっています。テンプレート自体はこの章の後半で詳しく見ていこうと思います。
Now that we have rendered the top of the page, it’s time to loop over the blog posts, rendering them one at a time. The first thing we do is declare our variables and our loop:
トップページをレンダリングするには各記事ごとに繰り返し実行する処理が必要になります。変数とループ処理を次のように定義するとよいでしょう。
    var row, key;
    while (row = getRow()) {
      var post = row.value;
      key = row.key;
The row variable is used to store each JSON view row as it is sent to our function. The key variable plays a different role. Because we don’t know ahead of time which of our rows will be the last row to be processed, we keep the key available in its own variable, to be used after all rows are rendered, to generate the link to the next page of results.
rowという変数はviewの各結果ごとに、自分たちで定義する関数の引数として取得することができます。key変数はさらにことなる役割を担っています。単純にrowだけを見ていては最後のデータ行がいつやってくるのか判断できません。key変数はrow.keyのデータを格納しておいて、全てのデータ行がレンダリングされたら次のページへのリンクを生成する処理に移行するための基準として使っています。
send(template(templates.index.row, {
    title : post.title,
    summary : post.summary,
    date : post.created_at,
    link : showPath('post', row.id)
  }));
}
Now that we have the row and its key safely stored, we use the template engine again for rendering. This time we use the template stored in templates.index.row, with a data item that includes the blog post title, a URL for its page, the summary of the blog post we generated in our map view, and the date the post was created.
rowとkeyをうまく獲得できたら、再びテンプレートでレンダリングします。今回はtemplates.index.rowというテンプレートを使っています。そしてテンプレートに対して記事のタイトル、ページのURL、viewのmap関数で生成した記事の要約、記事が投稿された日付を引き渡しています。
Once all the blog posts included in the view result have been listed, we’re ready to close the list and finish rendering the page. The last string does not need to be sent to the client using send(), but it can be returned from the HTML function. Aside from that minor detail, rendering the tail template should be familiar by now.
viewの結果が全て処理されて一覧として表示されたら、あとは処理を終了させるだけです。最後の文字列はsend関数を使わずに、return文のところで実行します。return文で末尾を表示させるためのテンプレートを読み込んで、HTMLの表示処理を終了させるとよいでしょう。詳細は別として、末尾のテンプレートもこれまでと同様のやり方で記述します。
    return template(templates.index.tail, {
      assets : assetPath(),
      older : olderPath(key)
    });
  });
Once the tail has been returned, we close the HTML generating function. If we didn’t care to offer an Atom feed of our blog, we’d be done here. But we know most readers are going to be accessing the blog through a feed reader or some kind of syndication, so an Atom feed is crucial.
ここまでで、HTMLを生成する関数は終了です。ここではAtomフィードには触れませんでしたが、実際にブログを運用するときには実装したほうがよいでしょう。RSSリーダーでブログを読む人たちを無視することはできません。
provides("atom", function() {
The Atom generation function is defined in just the same way as the HTML generation function—by being passed to provides() with a label describing the format it outputs. The general pattern of the Atom function is the same as the HTML function: output the first section of the feed, then output the feed entries, and finally close the feed.
Atom配信フォーマットで出力する場合もHTMLのときと同じです。provides関数の引数として出力時の書式を指定します。関数の中身のHTMLとほぼ同じです。フィードのヘッダ、フィードの中身、終了処理のそれぞれを定義していきます。
    // we load the first row to find the most recent change date
    var row = getRow();
One difference is that for the Atom feed, we need to know when it was last changed. This will normally be the time at which the first item in the feed was changed, so we load the first row before outputting any data to the client (other than HTTP headers, which are set when the provides function picks the format). Now that we have the first row, we can use the date from it to set the Atom feed’s last-updated field.
HTMLと違うのは、最終更新日がいつであるかを知る必要があるところです。これには、フィード内の最初のアイテムが変更されたときの時間を取得して対応します。タイミングとしてはクライアントへデータを出力する前に取得しておきます(HTTPヘッダーから取得するのではなく、provides関数がレンダリングするときに日付を取得して設定します)。最初の行データを取得するときにAtomフィードの最終更新日を設定するようにします。
    // generate the feed header
    var feedHeader = Atom.header({
      updated : (row ? new Date(row.value.created_at) : new Date()),
      title : blog.title,
      feed_id : makeAbsolute(req, indexPath),
      feed_link : makeAbsolute(req, feedPath),
    });
The Atom.header function is defined in lib/atom.js, which was imported by CouchApp at the top of our function. This library uses JavaScript’s E4X extension to generate feed XML.
Atom.header関数はCouchAppのlib/atom.jsからインポートして使用します。XML形式のフィードを生成するために、このライブラリーはJavaScriptのE4Xエクステンションを使用しています。
    // send the header to the client
    send(feedHeader);
Once the feed header has been generated, sending it to the client uses the familiar send() call. Now that we’re done with the header, we’ll generate each Atom entry, based on a row in the view. We use a slightly different loop format in this case than in the HTML case, as we’ve already loaded the first row in order to use its timestamp in the feed header.
フィードのヘッダーを生成したら、send関数でクライアント側へヘッダーを送信します。その後、残りのデータ行から各エントリーを生成していきます。最初のデータ行を更新日付を取得するタイミングで読み込んでいるため、ループのロジックがHTMLのときと少し異なります。
    // loop over all rows
    if (row) {
      do {
The JavaScript do/while loop is similar to the while loop used in the HTML function, except that it’s guaranteed to run at least once, as it evaluates the conditional statement after each iteration. This means we can output an entry for the row we’ve already loaded, before calling getRow() to load the next entry.
HTMLで出力するときとほとんど同じですが、do / whileのループを使用しているため、最低でも一回は括弧の中の処理が実行されます。行データが一件はあることが前提になるため、if文でデータ行の有無を最初に確認しています。次のgetRow関数が実行されて次のエントリーが読み込まれる前に、読み込んだデータ行をエントリーとして出力することができます。
        // generate the entry for this row
        var feedEntry = Atom.entry({
          entry_id : makeAbsolute(req, '/' +
            encodeURIComponent(req.info.db_name) +
            '/' + encodeURIComponent(row.id)),
          title : row.value.title,
          content : row.value.html,
          updated : new Date(row.value.created_at),
          author : row.value.author,
          alternate : makeAbsolute(req, showPath('post', row.id))
        });
        // send the entry to client
        send(feedEntry);
Rendering the entries also uses the Atom library in atom.js. The big difference between the Atom entries and the list items in HTML, is that for our HTML screen we only output the summary of the entry text, but for the Atom entries we output the entire entry. By changing the value of content from row.value.html to row.value.summary, you could change the Atom feed to only include shortened post summaries, forcing subscribers to click through to the actual post to read it.
エントリーをレンダリングするときはatom.jsにあるAtomのライブラリーも使用します。レンダリングする内容を設定している部分を見ると、HTMLのときはエントリーの要約を出力しているのに対し、Atomで配信するときはエントリー全体を出力しているのがわかります。contentへ設定する値を、row.value.htmlからrow.value.summaryに変更すると、フィードの内容をエントリーの要約のみにすることができます。読者が実際の記事全体を読みたい場合はクリックして実際のブログを表示してもらうことになります。
      } while (row = getRow());
    }
As we mentioned earlier, this loop construct puts the loop condition at the end of the loop, so here is where we load the next row of the loop.
先ほども述べたように、コードの末尾でループ処理の終了条件を定義しています。ここで新しいデータ行を読み込んでいます。
    // close the loop after all rows are rendered
    return "</feed>";
  });
};
Once all rows have been looped over, we end the feed by returning the closing XML tag to the client as the last chunk of data.
全てのデータ行に対する処理が終了したら、XMLのタグを終了するための処理を実行してクライアントへまとまったデータを返すようにします。
Figure 1, “The rendered index page” shows the final result.
完成したブログはFigure 1, “The rendered index page” のように表示されます。
Figure 1. The rendered index page
This is our final list of blog posts. That wasn’t too hard, was it? We now have the front page of the blog, we know how to query single documents as well as views, and we know how to pass arguments to views.
それほど難しくはなかったと思いますが、いかがでしたか?ここまでの内容で、ブログのフロントページを構築し、viewへ引数を渡すことでドキュメントの集合に対して問い合わせをする方法を理解することができたはずです。今度はブログに寄せられたコメントをどのように処理するかを解説していけたらと思います。